Moving towards the light #mamarazzi #photography101

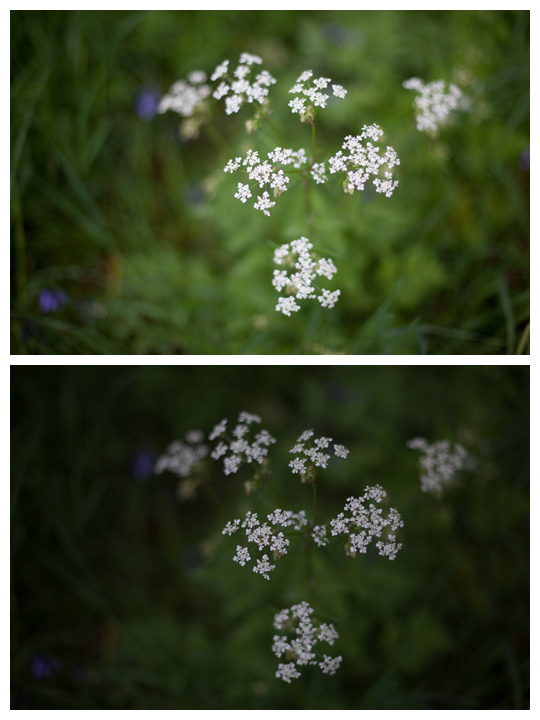
Light is what photography is all about, you get that by now right? Light pretty much governs everything about your image so its fairly significant!

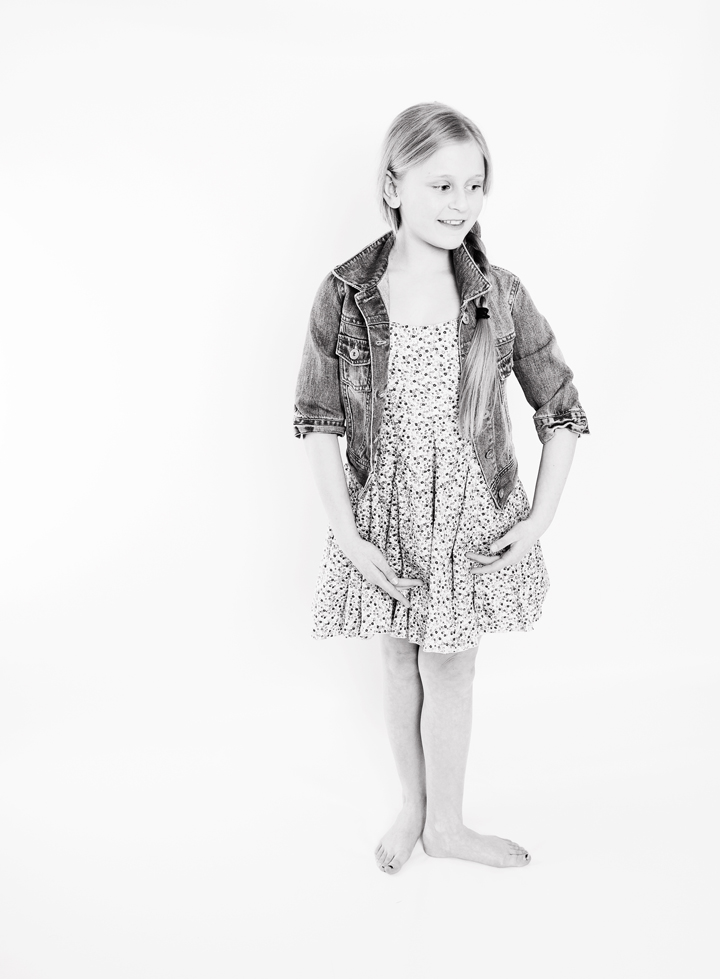
A lovely way of lighting is by putting your light to the side of the subject, it adds a real depth to an image, a lovely three dimensional quality. You know when you look at an image and there is just something about it that draws you in, often that is because this sort of lighting is being used. Its the sort of image that has a really strong distinction between the highlights and shadow across the face.

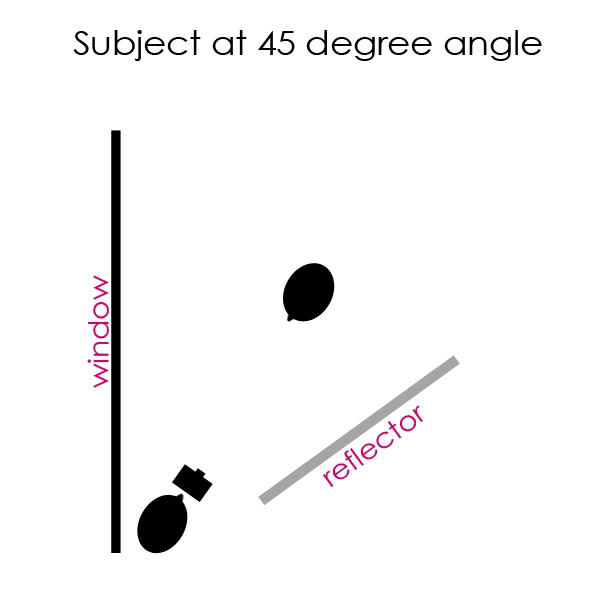
A general rule is to put your subject at a 45 degree angle to the source of light, which for most of us in going to be a window if we are inside and trying to get our kids to sit still. Or it can be outside usually when the sun has a directional quality about it, like during the golden hour (hour after sunrise and hour before sunset)

This is harder to control when you are taking a picture of a kid, the reason for this? Same as usual. They move. If they turn their head that little too much you are going to end up with all in shadow.  One way of working out if it is slightly too much is if you look in the eyes of your child and can’t see catchlights in both. They chances are they have moved too much, so just try and get them to turn a little, easier said than done right! 😉

It is a beautiful style of lighting and is a favourite of portraiture photographers. It adds so much to the picture, its also pretty good for slimming if you are thinking of wanting to loose a few pounds as well 😉


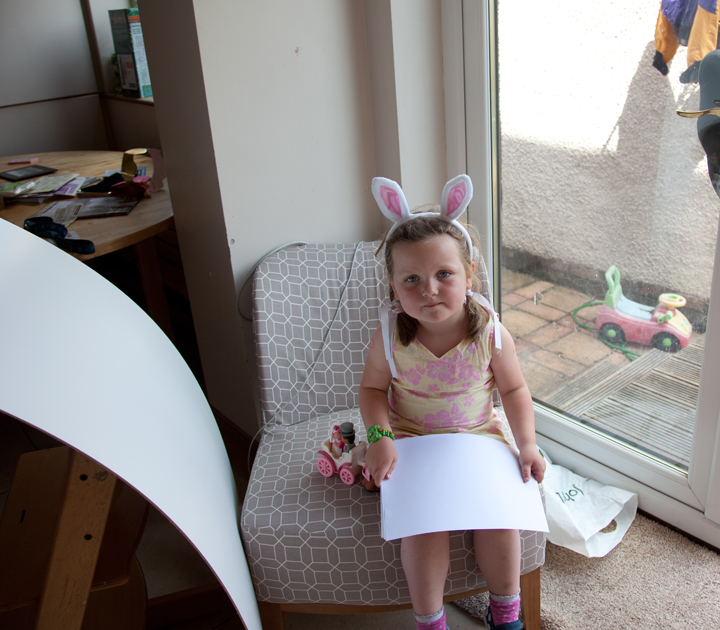
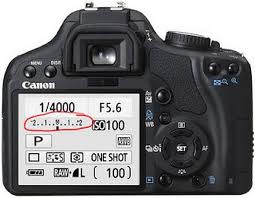
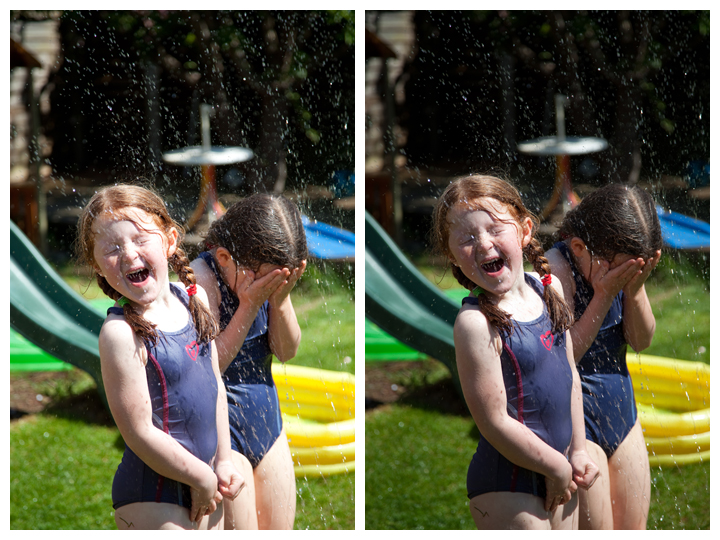
Okay so here is a little project you can try out… this is a really clever and everso simple thing you can do here…this works in any lighting scenario to be honest…in the little diagram at the top of this image you can see that next to the person icon is a line saying reflector.

This does pretty much what is says and reflects light. It absolutely does not need to be a massive big reflector that you might have seen professionals using. No. It can be anything white pretty much…white is a very good reflector of light. Just even by using a sheet of paper you can see changes.

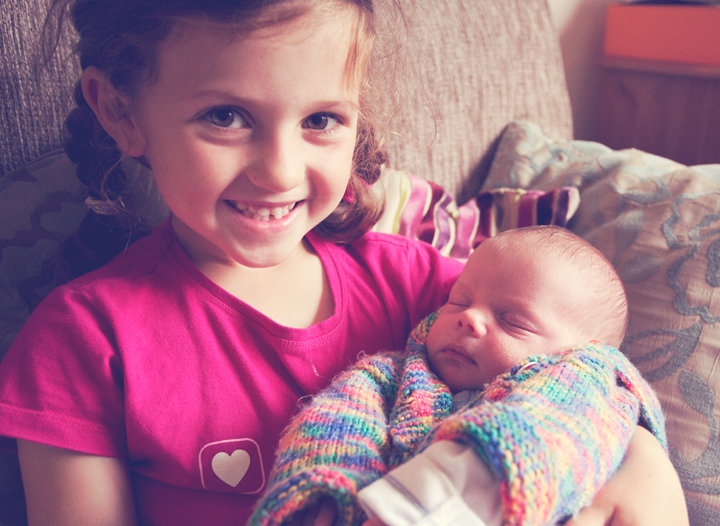
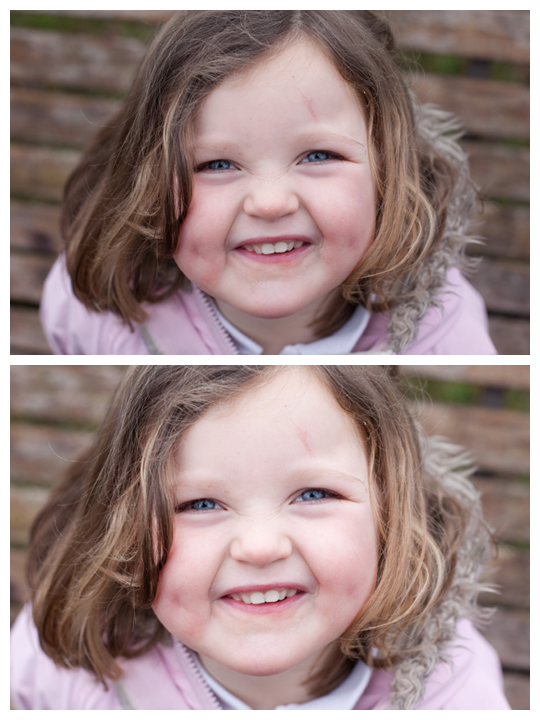
I did a demonstration with this today with my daughter who was a total trooper after having her pre-school booster imms this morning. She was working for smarties it has to be said. Ive done no editing to these images so you can see it as is. This is really easy to do…no dont think its all fancy photographer stuff. You can do it!! Try it out.

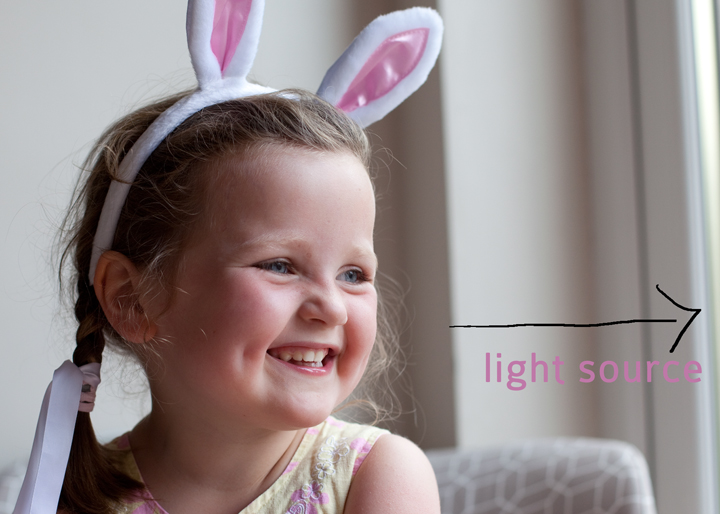
So here it is…sit your subject next to window or a light and aim for about 45 degree to the light…So this first shot is just the window light, you can see where the light drops off her face. yes?

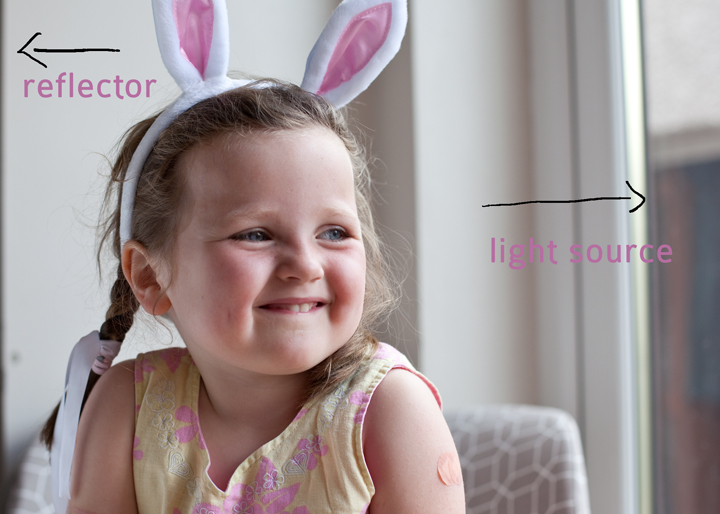
Enter reflector to the left, this is a white bit of card that i got from b and q. You can see how the side of her face has just brightened up a bit. She did turn a little bit away in this one.

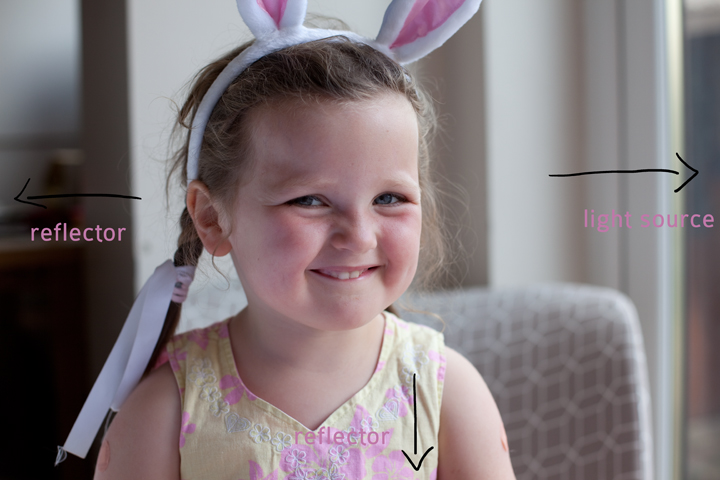
another reflector, you can see what it is by scrolling down. The reflector is on her lap so reflecting the light back into her face. The shadows have almost balanced out on her face now.

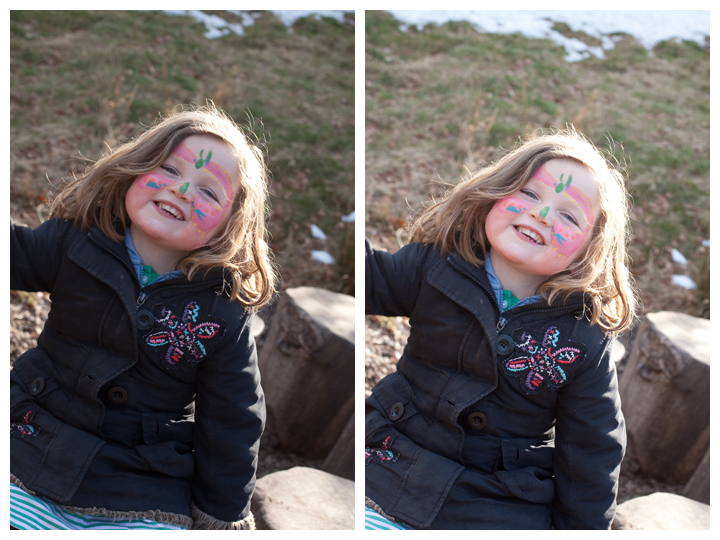
Yes mum im really very happy about this…

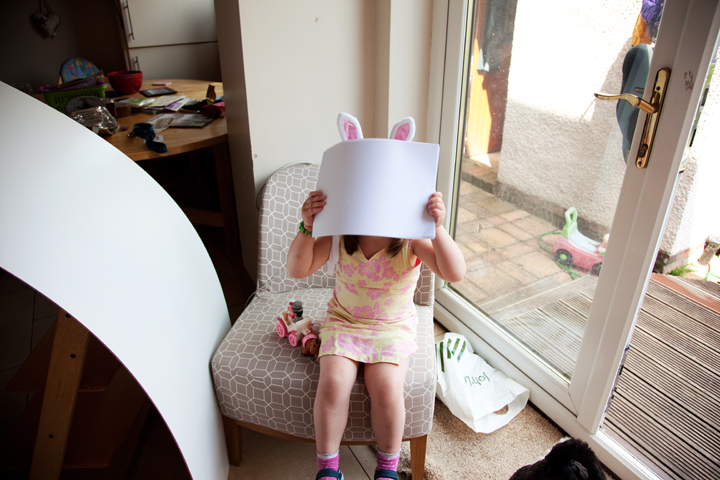
Er..no..not ON your face!

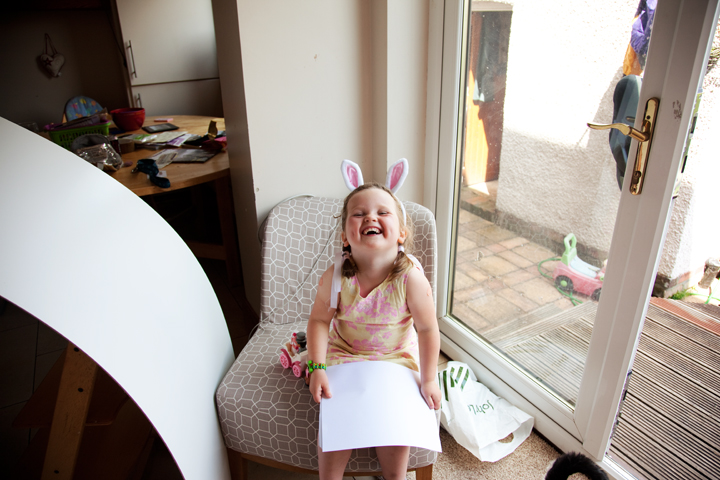
Yes..its all funny till mummy asked me to do it again!

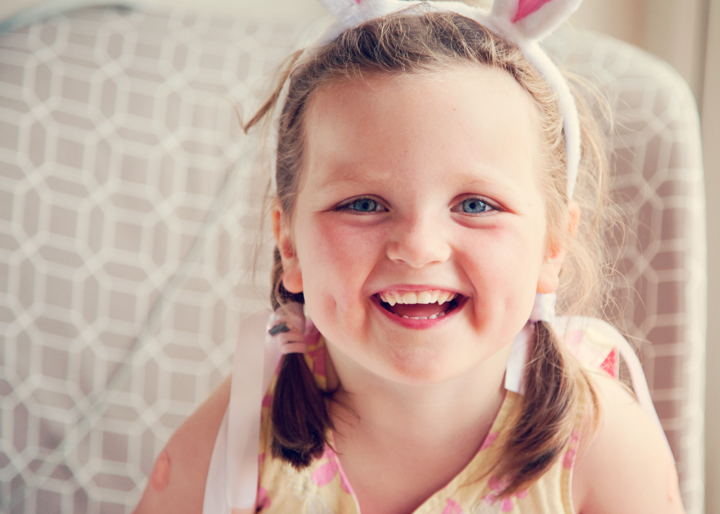
 and the finished shot….my little girlie…

So what do you think? ready to give it go? Do let me know how you get on.

Follow:

Its all in the meter #mamarazzi #photography101

Okay so this is one of my favourite little tweaks you can do ‘in camera’ to your images and it can really make a massive difference. When we are talking about metering, we are not meaning those folk who turn up in high vis jackets to rummage through your under stairs cupboard to read your gas meter. Which incidentally WHY are they always in such ridiculous to reach,buried by debris type places? Who designed that? Anyway i digress..

Have you ever seen this:


The thing that that is being held in front of the model is called a light meter and it is basically an external devices that measure the light in any given situation. When parked in front of someone like this and pointing toward the light that is hitting the subject it will spew out some numbers which should, when plugged into a camera, properly expose an image. Which is great. Problem though? Every time your light changes you have to bob out in front of your subject an take another reading…not so handy when you have a small, wriggly kid.

So the gods of digital put a device like this IN the camera itself.  YAY!   : )

and it should be one of your favourite tools.

Right so where is it? Here are a couple of screen grabs of what it should look like on your camera:

It looks a little like a thermometer dial and you can see that it goes from -2 to +2 either side. These are called stops but without getting confusing going for the add side you are going to add more light into your image and the other way it will be darker. Simples. The Zero icon in the middle is correct exposure and what you should be aiming for most of the time.

So easy way to get started. Pick and ISO and plug it in, you can do this in manual mode or generally one of the priority settings (as in aperture or shutter). You can’t do this in auto modes usually. Anyhow so pick an ISO, (100-400) outside on a bright day. Then point your camera at something and change the aperture or shutter until the little line in the middle of the thermometer bar is in the middle. POW! perfect exposure all created by YOU!

One thing to bear in mind though is that your camera can be fooled, if there is a lot of light around then it can work out the values incorrectly and you can end up with an over exposed image. This is where practice comes in and being able to account for it and then changing your little dial to adjust for that difference. For example in back lit situations, your camera will meter for the light which will make you subject dark. So what you want to do is go up a coupe of stops towards +2. That lets some more light in and will hopefully illuminate your subject as well.

Here ‘s a bit of an example of what i mean..

In this image, i have adjusted the exposure by half a stop. You can see the difference it has made! Just one or two clicks to the + side and you can really change the look of the image. I did these adjustments in lightroom just to give you an example.

then here in this image i have taken it down a whole stop. So that the brightest part of the image really stands out, thats going towards the – end.

especially useful when you are dealing with a LOT of very bright sunshine…just tames things down a bit,click half a stop down.

and very useful in a backlit situation when your setting would naturally be too dark for your subject (because the bright glow from the sun is fooling the camera) Up half a stop towards the +

what a difference a setting can make, this is the exact same shot taken in two different ways. One on the right i exposed for the foreground, trees and grass. In the second i exposed for the sun. How beautiful is that starlight and see how we are now bringing out the colours in the sky rather than just a big white mass.

So what do you think? worth giving it a go? have a play with your metering and let me know how you get on.


Follow:

what is RAW all about? #mamarazzi #photography101

This week i thought i would muse on something a little more about quality settings within your camera and details about image file format….

yeah i so know that half of you have just fallen asleep…ha!

Anyways i have been asked about RAW before so i thought i would mention it.

Most of your DLSR’s will be able to give you two choices of what mode you want to shoot your images in, what file format. The standard mode is JPEG, which a really useful file format. Its relatively small, simple to store, uploads into all editing programs, can be uploaded to the internet and sent in email.

So why would you consider something else, if you have this super duper fits all format?

Well a raw file is basically giving you more information in your file and therefore gives you more options of what you can do with your image in post processing. For example you can restore some detail in a blown out image or bring in some light to a dark image, change your white balance or make some more sophisticated photoshop edits.

So why do any of us shoot JPEG then if RAW gives us so much more. Well RAW files are mahoooooosive. They take up some serious space, your storage space is just going to get eaten up with raw files. Ask my OH how many times he tells me to delete some files as the hard drives (and i have three) are getting full. Also you might have to buy more software to be able to process raw files. Software companies such as adobe do not always have the standard format for certain raw files form certain cameras, particularly if you have older software and you are buying a newer camera.

So i guess the thing is to weigh up whats more important to you, space or image data and control. You can even experiment a little as a lot of cameras will allow you to shoot in raw and jpeg. So you can do a bit of both. That will suck your memory cards though. Remember if you have a 4gb memory card then you won’t be able to store as many raw on that card as you will jpeg.

So..how to change the image quality. This is on a canon camera. Should be easy to navigate to on other makes. Im making no comment about what camera is best. The photographer takes the picture remember!

You need your menu, go into quality and you see the icon that looks like a little wedge of a cheese. 🙂

There you can see the options you can go for.

If you are shooting in raw, make sure you have the software to read and use those files. So might be worth shooting jpeg and raw initially. In photoshop your raw file will be loaded into adobe raw, which is fabulous tool for some great editing options without going into full photohsop.

So a little example, this is just to demonstrate what you can do in adobe raw..so im not going to go into photoshop ..another time 😉

so this is my original image….


then taking it into adobe raw, if you have photoshop the image should open in adobe raw….looking a little something like this, you can see the image, the histogram on the left which shows you colour range through from darks to lights and then your options for editing down the side. You can see where there is red masking..that is where the pixels are blown out. It was direct sun (behind her).


on this one i have slid the ‘recovery’ slider which has drawn back some of those blown put pixels, you can see the red masked areas have gotten a little smaller? yes?

The square box is also where i will crop the image to.


Then i have slid up a little bit of vibrancy to make the colours pop a bit and used the ‘curves’  to bring a little bit of light into her face.

Ive also sharpened the image up a little.


This is the initial result. Now if you did that to a jpeg file, if its a lovely bright image like this where your camera and lens are not maxed out then it would be fine but if your camera is working pretty hard to get the light right and your ISO is high then editing your image may well leave it looking pretty grainy.


So what do you think? Have a play with it, see what you can do. Thats the brilliant brilliant thing about digital photography…you can just keep on trying without having to pay to develop a truck load of film.

Let me know how you get on.

Follow:

Composition #dadarazzi #photography101

This week instead of covering another technical aspect of your camera I though i would focus on a more artistic look at how we can make our pictures look desirable to the human eye.

Just before i start actually though, thanks so much for all your lovely feedback about these posts. The biggest thrill i get is that people say they are going to go and have a go with their camera. That is my aim. Not to come across as a big know it all camera person. Because I am so not. But just to encourage parents to get out there and capture life as it happens in their families. Like the Fool did last week, experimenting with shutter. This week im re-naming my mamarazzi as dadrazzi in his honour 🙂

Anyway..so this week its all about composition. What is it that makes you look at an image and go WOW.

As photographer we can control what the viewer sees in our image. That can be by using things like shutter/aperture and manipulating the light..but also how we present the image is important. Where is the eye drawn to in an image? How is it all coming together.

Here are a few basic ‘rules’ you can follow.

Leading Lines

This principle is based on leading your viewers eye to what you want them to focus on by the use of lines in an image. They don’t need to be straight, just needs to be something that ‘lures’ the eye to the object of interest.

Here are some examples..

you can use so many different things as leading lines..here are some train tracks…

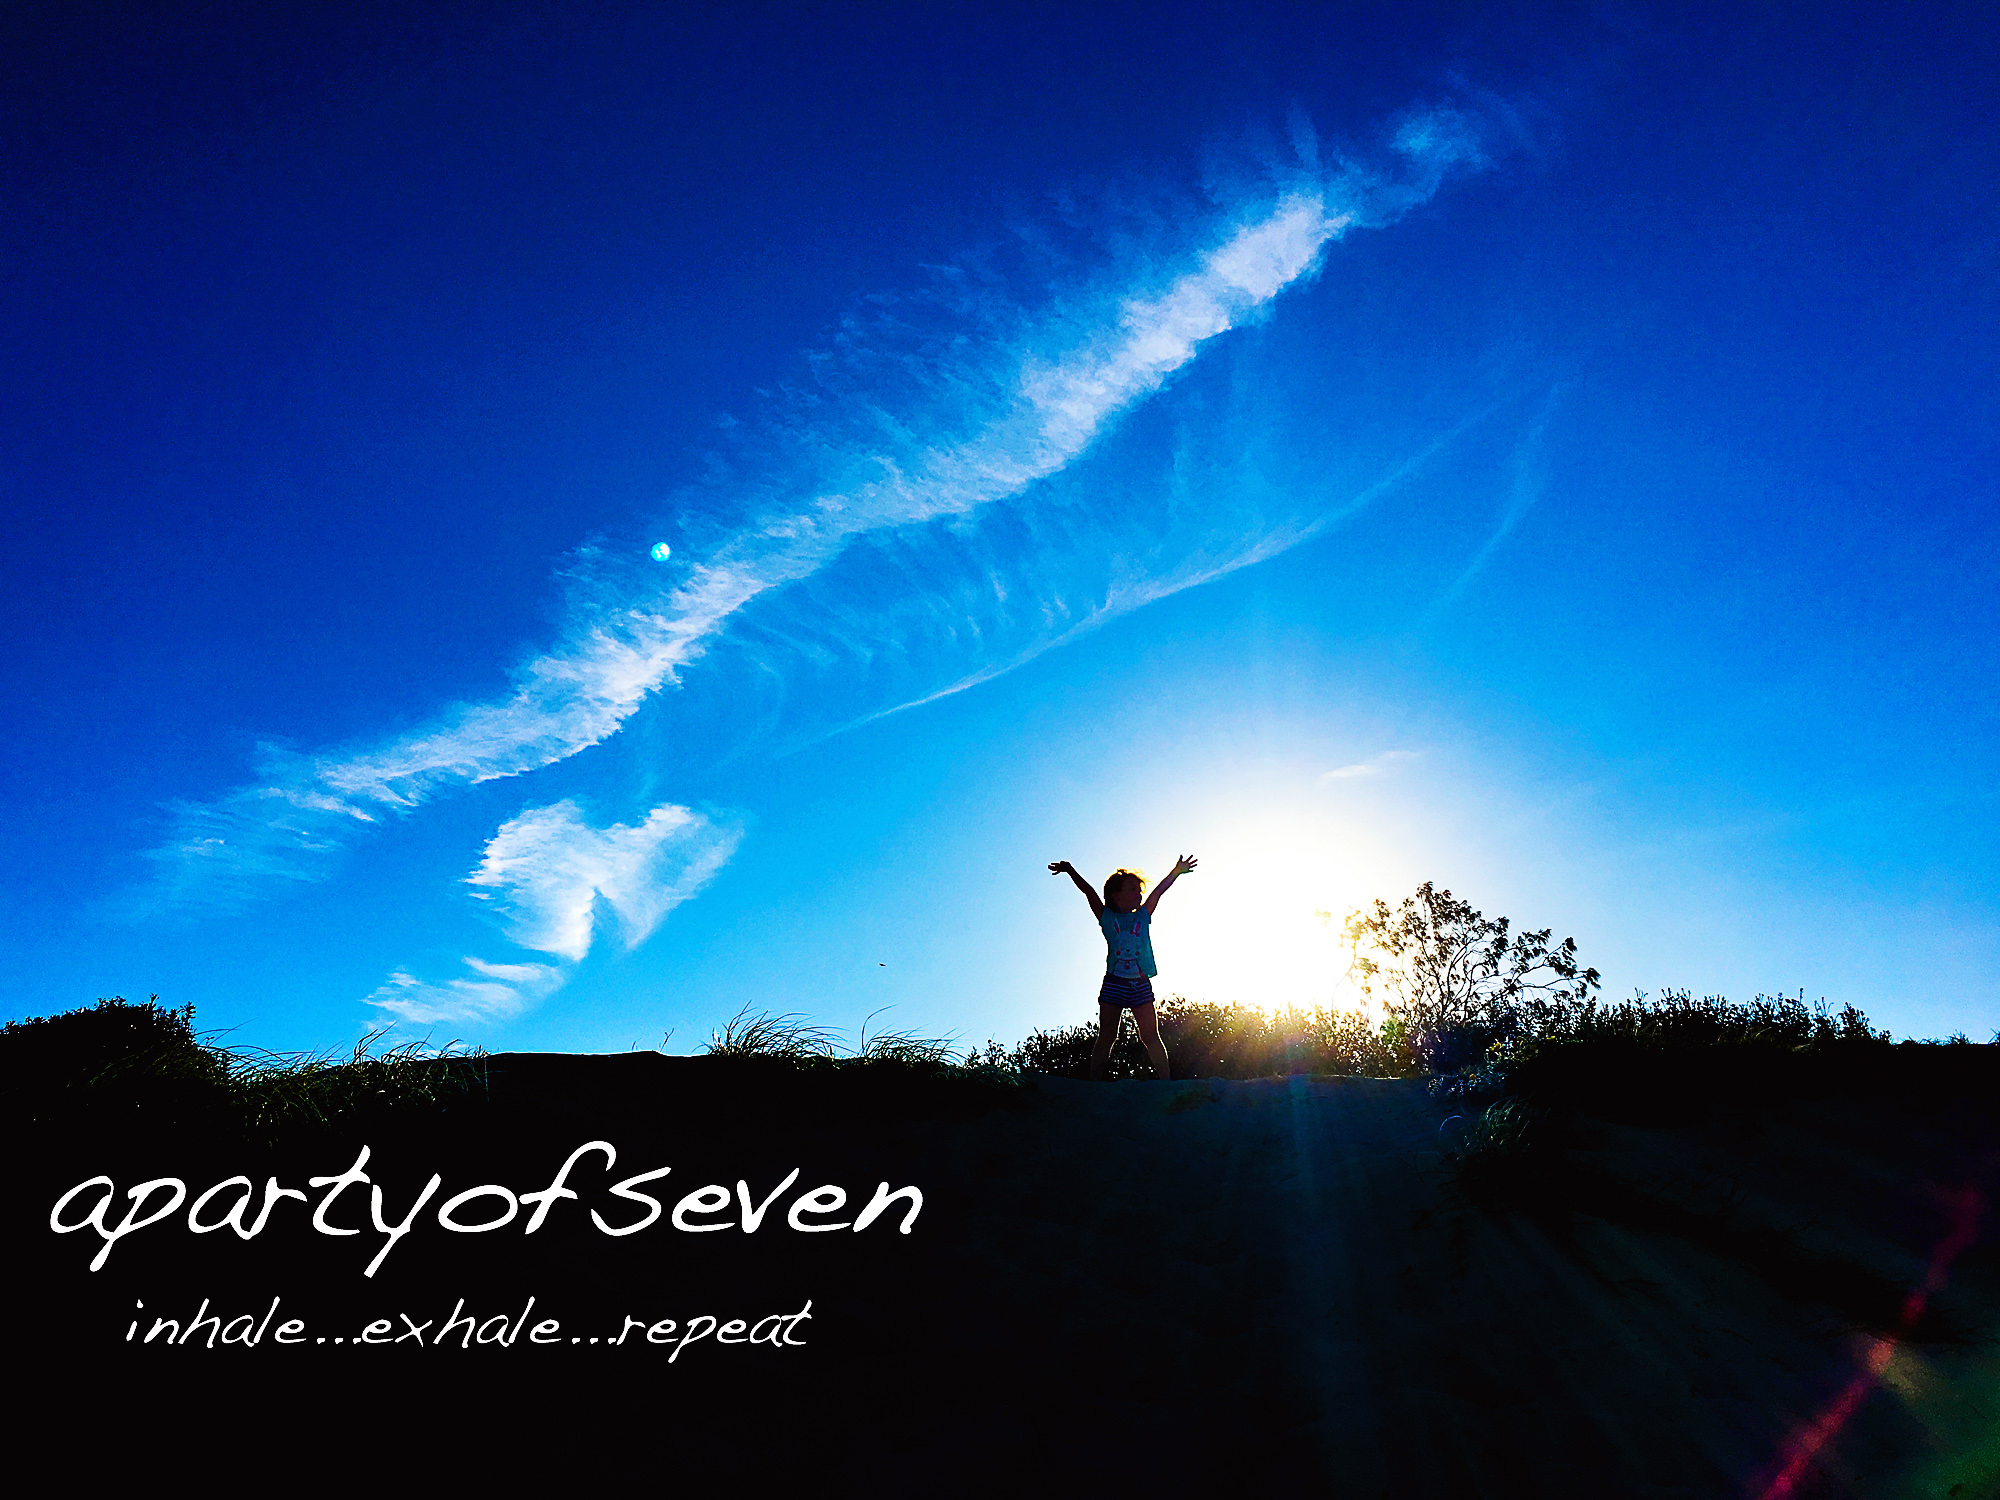
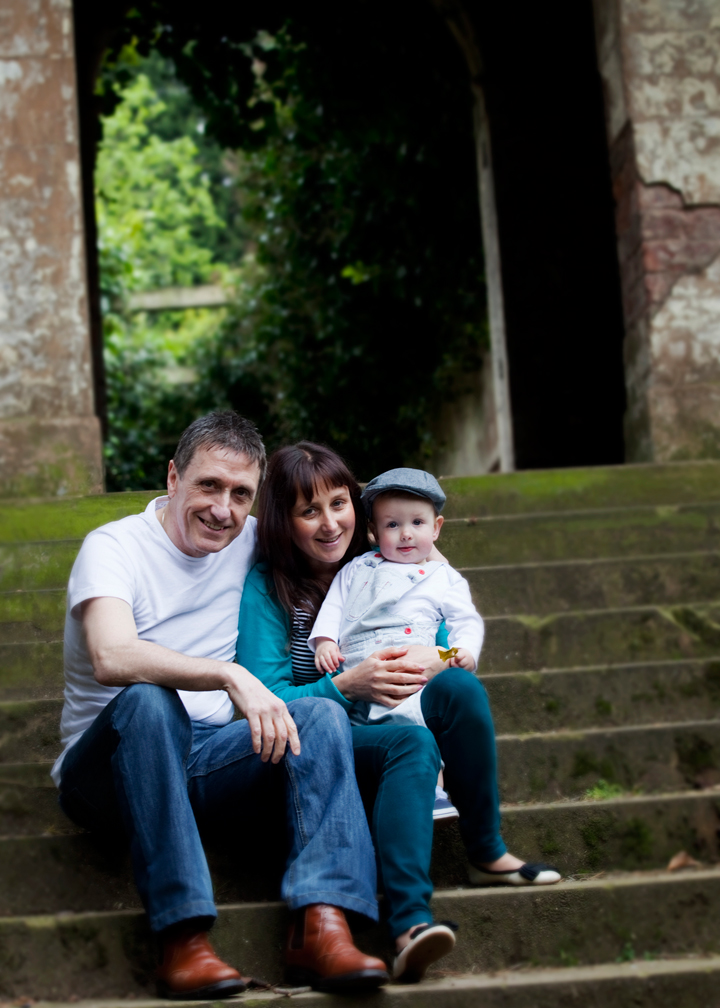
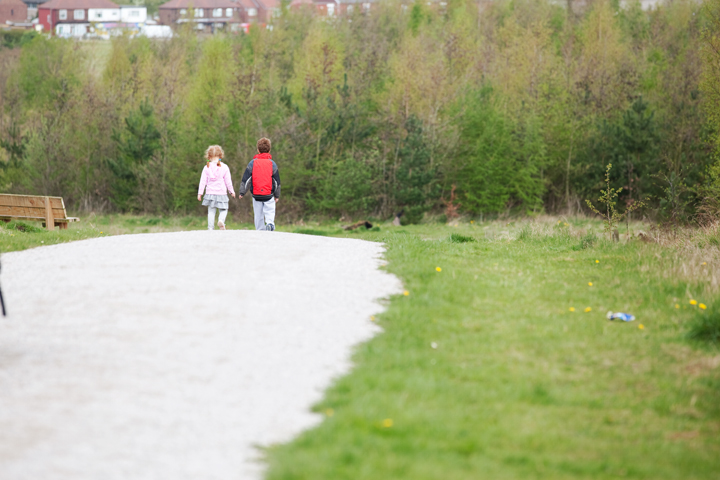
or something simple like a path

doesnt have to be just for kids either..you can use leading lines for anything you want to draw attention to.

fences are really good for leading lines, especially for portraits. get your subject to lean in to wall and then you do the same and shoot 😉

can even be something like a shadow

Frame it up

Im not talking about putting your picture in a frame on your mantel. Although we ALL probably need to do more of that and give our crippled hard drives a break from storing all those images that never get seen! But no what im talking about is using an element in your scence to provide a natural border that draws attention where you want it. You can use anything from the outline of a door or window to a row of trees of cluster of bushes. Basically anything that surrounds your subject will pack a punch.

Look for negative

Not as in, think negatively, but as in think about the power of negative space in your image…nothingness. It really can pack a huge punch. It means an area of your image that has no visual content in it. Intentionally leaving some empty space around your subject can make a huge impact. Works well when following the rule of thirds…

and lastly – for now…

Get off Kilter

So you think that you always have to have your subjects standing up straight and all your horizons level. Well sometimes its good to mix it up a bit and shoot on an angle. A tilted photo can add visual interest to your scene. The thing is to make your slant obviously intentional and not so awkward that your subject seems to be sliding out of the frame. Similarly, incorporating diagonal lines to your photo can aid the eye in moving across the image, giving your image energy.

Here are some examples..

So there are a few pointers, see what you think and if you fancy giving it a go, do let me know how you get on.


Follow:

How fast is your shutter? #mamarazzi #photography101

I am a big fan of the semi-automatic modes on a camera. Everyone seems to believe that the only way to shoot decent images is to be fully manual and be in control of all aspects of the image.

well…yes…maybe…. but there is a really big BUT…

You have to be able to know what you are doing in manual and moreover know how to set and change your settings very quickly….. not such a problem i grant you if you are shooting a landscape..because a landscape  isnt going to get all ants in its pants about sitting still on that lovely bench you have just plonked it on with its siblings.

No, most of us are mamarazzi, we are photographing our children and lets face it kids are often busy little things who don’t take much to being asked to stay still.

Unless they are asleep…and then you can knock yourself out playing with manual settings on your camera. 😉

But the truth of it is we want to capture memories and moments along the journey that is our own family story and i can tell you for nothin’ no kid of yours is going to look back at a picture of them proudly taking their first wicket in cricket and solemnly say to you ‘so what ISO did you have that on mama?’ 😉

Sometimes you just have to get the shot. In the can. If you don’t have time to faff with camera settings or you are not sure..wizz round to the ever faithful green square on that expensive camera of yours, pop the shutter and be PROUD.  Remember whats important and prioritise.

So anyway… semi-automatics. Like it suggests it controls some of the picture taking parts but not all. The main two that all most reasonable cameras will have is AV(aperture) or TV/S (shutter).

Basically they work like this:

Aperture Priority – lets you control the aperture (thats what gives you the blur) – the camera then picks the shutter and the ISO

Shutter Priority – lets you control the shutter (coping with movement) – the camera picks the aperture and the ISO

Now in theory – your camera should pick the right settings so that you get a reasonably exposed image. But that will depend on where you are and what the light is like.

These settings are a great way of learning how that one particular process (aperture or shutter) works.

Shutter- Speed

Do me a favour and if you have a dslr go and set it to a shutter speed of 1/10. Right press the shutter and listen and watch the front of your camera. The snapping sound is the shutter opening for one tenth of a second.

You can have it open for longer, if you can scroll up to a number with a symbol like this ” on the side. That is an entire second..so you can have your shutter open for 8 seconds if you like? Enough for you to go in and out the kettle on! Now wind it back up to 1/500 (if you can) and listen to how fast it goes..POW. Its all about action and thats what you are talking about with shutter speeds.

You can experiment with slow shutters – gives that lovely blurry effect and can give a real impression of movement..

These two pairs below are the same image but shot with a different shutter. Its more dramatic in the water one but you can see in the picture of my son how much clearer the jump is on the faster shutter (look at his finger tips)

So when you are planning on taking some pictures of something or someone moving fast then switching up to shutter priority would be a good move. Or if you want to capture the flow of water like the first two images here then go back down to a slow shutter speed and get some of those gorgeous effects. Just a little note though when your shutter is opening very slowly the camera will be effected by any movement…your hands moving, breathing..so you might want to think tripod  or just jam yourself against something like a wall and hold your breath when you press the shutter 😉

There is the classic jumping on the trampoline..try and do this without shooting through the mesh..its a bit tricky to pull off when your subject is moving all the time.

Playing with shutter speeds can give you a lovely capture of smallest of movements. Hair blowing in the wind…and other things blowing in wind. In the interest of authenticity i didn’t edit out the spit 😉

The one that we all are after, the school sports day shot.

Slower shutter produce really dramatic effects, like slowing down and blurring the gorgeous flames of the fire

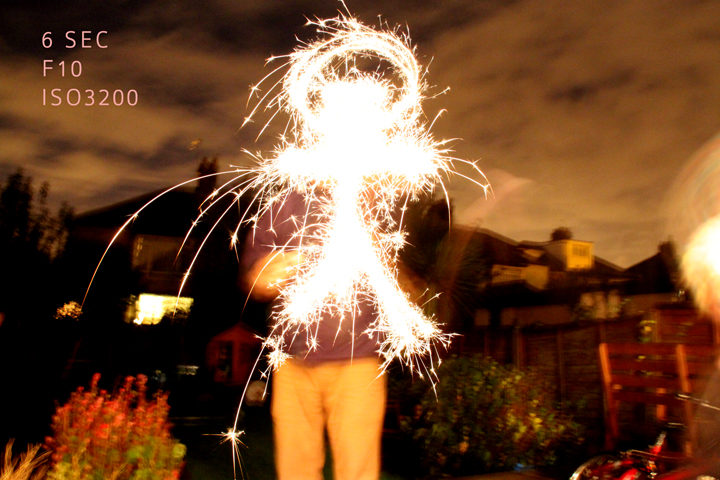
couldn’t do a post on shutter speeds without the firework one. I didnt have my camera on a tripod for this shot. I should have but what i did do was wedge myself against the doorframe for a bit more stability.

There you have it, so how about popping your camera onto shutter mode and getting out there and having a play.

Do let me know how you got on!

Follow: