A big fat thank you #britmums #bibs

Thats right, a huge thank you for taking the time to nominate me for a BIB! – thats brilliance in blogging award for photography. I am really very touched. 🙂

The next stage of the nominations is getting into the finalist category and to do that i need votes. So if you have a minute please head over and vote for me! Thanks once again. You seriously rock.

You can do that here!!

i plant a big sloppy kiss on your cheek.

peace.

Leaving you with a cheeky little curly girl..

Follow:

Which lens should i choose? #mamarazzi #photography101

The question i probably get asked the most..apart from how do i get my kids to sit still for a photo 😉 is ‘what lens should i go for?’

A lot of people have no got dslr’s and the fabulous thing about these cameras is that you can choose from an army of possible lenses that do all sorts of different things. So where do you start?

Let talk a little bit about what the lenses actually ‘do’  Generally speaking you can choose between zoom or prime lenses. A zoom lens…er….zooms and a prime lens doesnt. Easy peasy

The focal length is a measurement that is usually measured in millimeters and very simply put will effect how close or far your subject appears from you when you are looking through the viewfinder.

The merits of prime.

Personally some of my favourite lenses are prime lenses. The benefits of prime lenses are that often they are sharper and can bust out some pretty wide apertures ,meaning that you can create more of those dreamy blurry backgrounds that we all love and the added benefit of shooting at a wide open fstop is that you are letting more light into your camera. Hands up who takes a lot of pictures inside?

Well if you don’t live on a house that light pipes funnelled into the ceiling or an entire wall of glass open to light then this factor really helps! Canon and Nikon both have a relatively cheap 50mm prime lens..fondly referred to as the nifty fifty 😉

The merits of zoom. 

What zoom lenses might lack in crispness they make up for in flexibility and function. A zoom lens allows you to use multiple focal lengths. Which is good for those of us who want to stand over the other side of school playing field on sports day and zoom in on little Johnny doing the sack race.

But try to remember that no zoom lens works at its best at its most maximum output. So you might think you’ve snapped him clearly coming across the finish line in first but ultimately it may be exceptionally blurry. Another thing that a cheaper zoom will do is change the aperture as you punch out the zoom. This is something that lots of people get stumped by. You have a nice shot all lined up, perfect lighting and everything…you think to yourself ill just zoom in a bit then you snap the shot and it is dark. The reason for this, is variable aperture. These lenses cannot maintain a wide open aperture when they are changing their focal length.

Make sense? no? well what it means is that it will allow less light in because it will automatically change the aperture whilst you are using the zoom. So you just need to think about your light.

There are zoom lenses that can maintain the aperture throughout…but they are pretty pricey. Not that there is much that isnt in photography to be honest 😉

Focal length

There are so many different options when it comes to focal length.

Wide angle: as suggested, it has a wide angle, great for when you want to get as much in your picture as possible, they can distort the view though..so if you have a person right at the edge of your frame they might take on an interesting bend! A bit like the funfair! But i think they can make for some very dramatic shots although you have to be careful as they can be a little unflattering on faces. less than 20mm – extreme wide angle (fish eye)  20-35mm – wide angle

Standard and portrait lenses take images that are much more flattering to the human eye. Standard focal length (50mm)  is what the human eye ‘sees’ naturally. Apparently it is the lens that a forensic photographer would use as it most truthfully depicts a scene! 35-70mm (standard angle)  70-105mm (portrait) 

Telephoto: magnify a given object, making them seem closer – anything 105mm and up!

I could go on and on about lenses. Most pro photographers will always say ‘its all about the glass!’ That meaning its all about the quality and ability of your lens rather than your camera. Might be food for thought eh?

Here are some examples…


beautiful 50mm lens with its wide aperture, you can create lovely depth of field and you can pick out those lovely details

60mm macro lens. I really loved this lens then had to say goodbye when i moved to a different camera body that it wouldnt fit onto. 60mm f2.8

35mm medium wide lens and you can get some detail and show more of a scene. The very beautiful Miss Violet 🙂

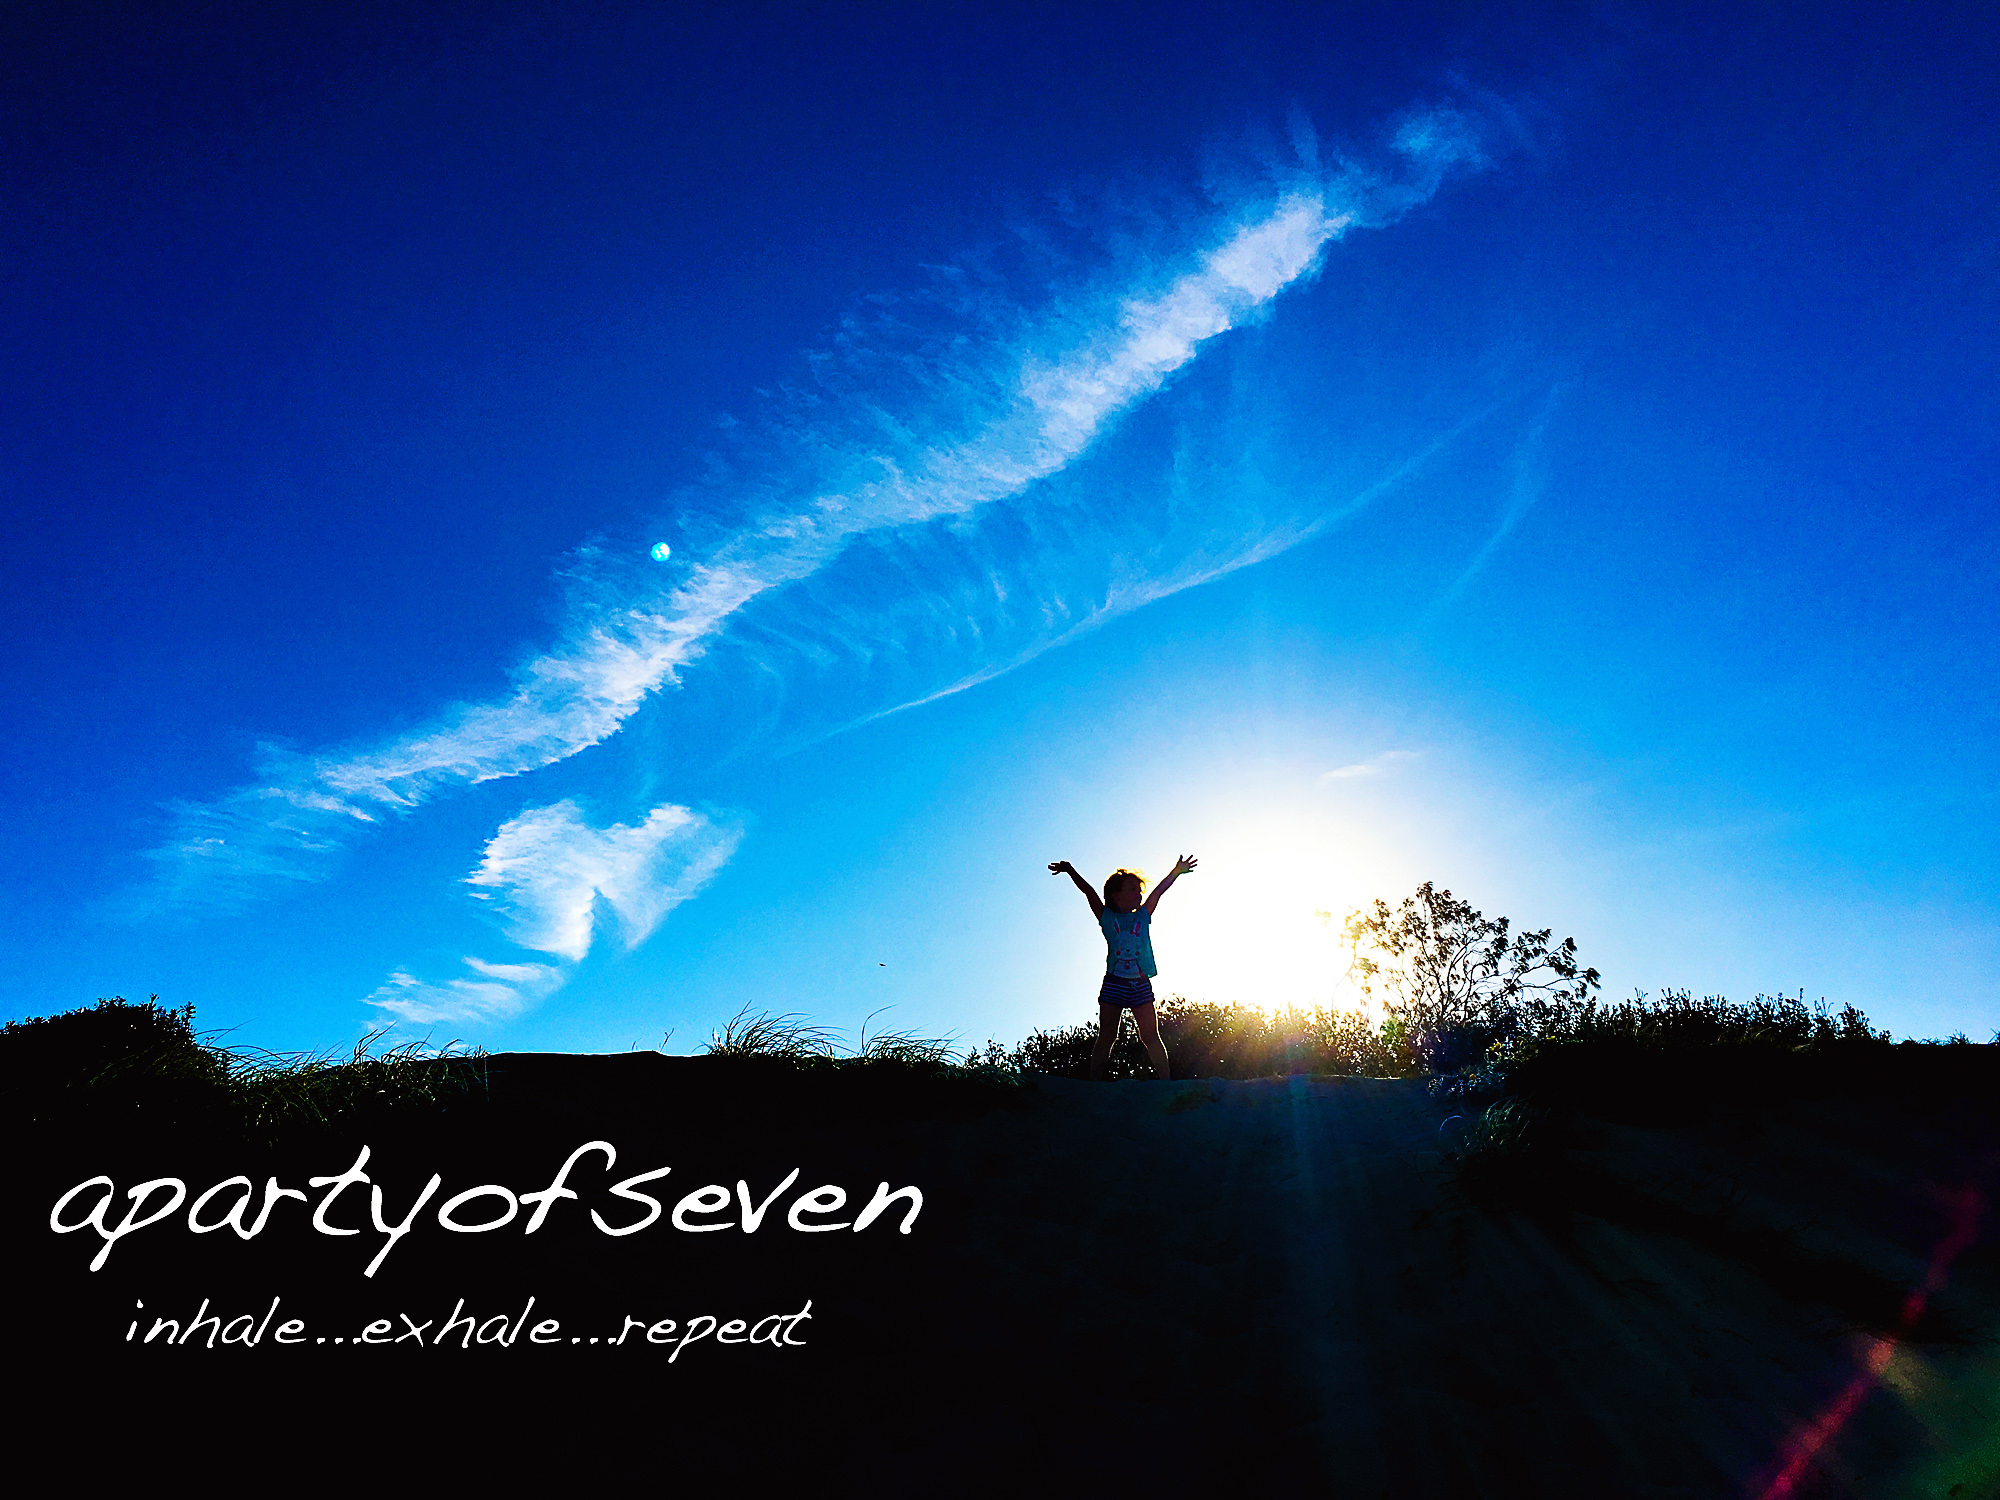
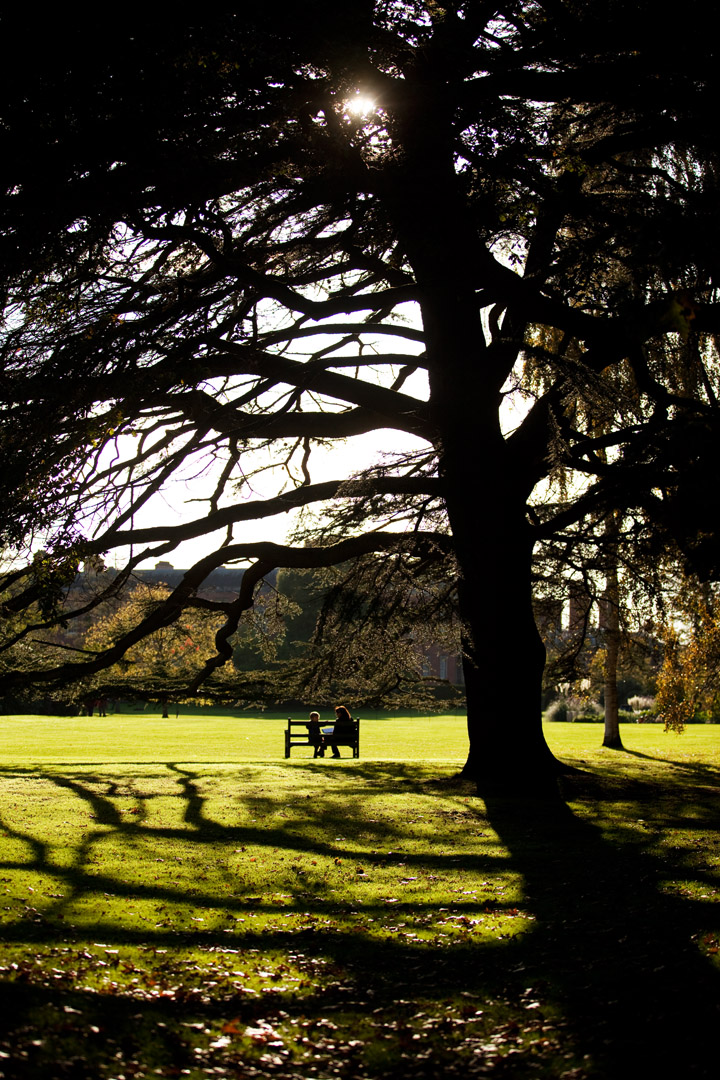
190mm f3.5 Using a telephoto lens can get you up close and personal to your subject, so you can capture those little moments without being in their faces! 

one of my favourites again, the 50mm. True to the eye and perfect for capturing those details…especially inside!! This was in quite a dark living room.

35mm again capturing more of the scene…

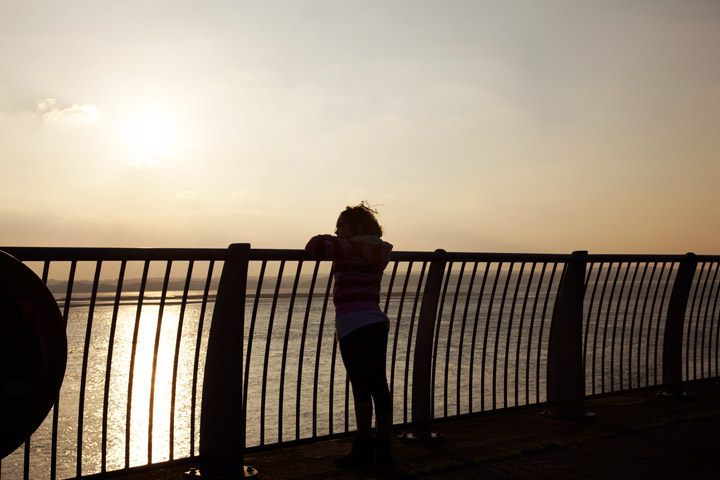
A true portrait lens of 70mm. This was taken with my 70-200mm lens. 

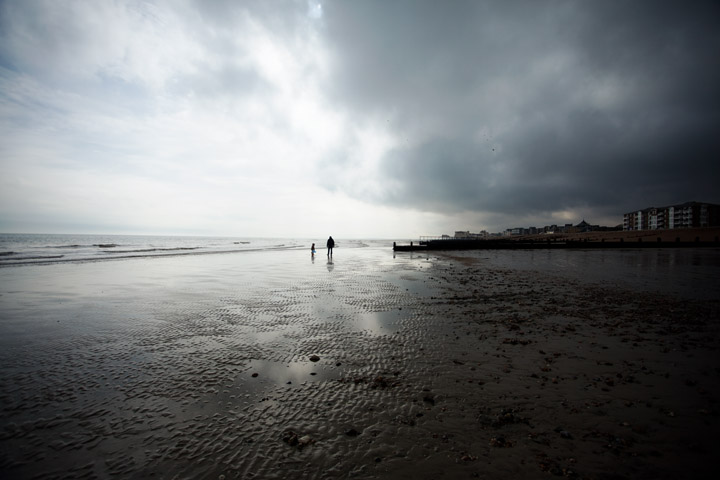
This is what i was talking about with regards to extreme wide angle. This is 17mm. You can see the bending effect. I think it works quite nicely with this image though.

 105mm portrait. Good thing about telephoto lenses is they can give you that lovely blur or ‘bokeh’ behind your subject

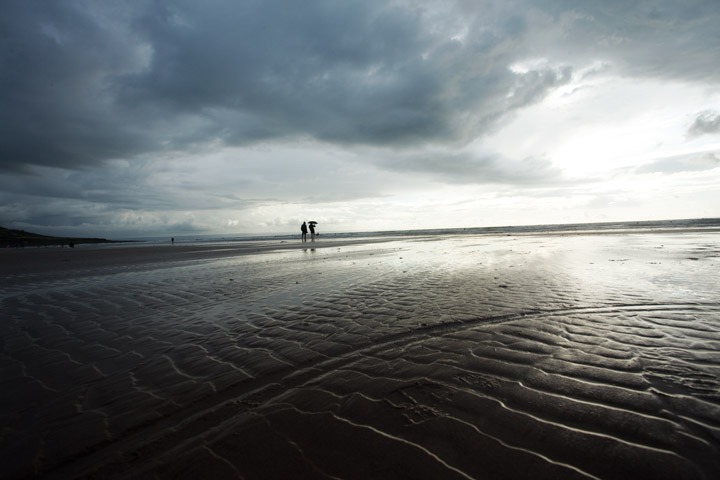
15mm fish eye – extreme wide angle but i think the quirkyness of this image works really well as it has strong lines made by the railway lines. Love this little lens. Its fun!!

I am by no means a total expert but if none of this makes sense shoot me a comment on twitter @apartyofseven and ill do my best to help.

Happy shopping 🙂

Follow:

So whats with Silhouettes? #mamarazzi #photography101

There is a really easy way to give your photo extreme drama! Its shooting your subject in silhouette. You can do this in extreme light situations. Generally the light will be behind your subject and usually its the sun.

In this scenario you are exposing for the sky instead of the subject. This leaves your subject underexposed, remember what i said about kids not being as bright as the sun! 😉

The goal is to have them pretty much blackened out and then you produce a lovely silhouette and not a muddy, dark subject in the foreground.

To get a great silhouette you need to think about the light that is behind your subject. A sunrise or sunset works really well. You can do it at other times of the day when the sun is out. But sunset and sunrise give you the beautiful ‘golden hour’ light when the sun is at its delicate most pretty light and it will just make your sky and image dreamy.

But there isnt many of us who will drag our kids out to the hilltop or beach at crack of dawn so lets just say use the sun when you can 😉

Your camera, if you have it in auto, will be convinced that you need extra light in the dark situation and so will probably pop the flash up and try and add in some light. Make sure you turn the auto flash off.

So a basic approach to get a silhouette:

1. Point your camera toward the sky ( your light source)

2. Press your shutter halfway and keep it pressed down.

3. Now keeping your shutter pressed halfway aim the camera back at your subject. Its also good to aim to not move your camera back and forth but keep it up and down or side to side…just to stop your camera’s autofocus from jumping about.

4. Depress the shutter totally and BAM…there it is.

I find that really good silhouettes work better when there is a clear outline of your subject. So a beach or another open vista. If you are trying to do a silhouette where there are lots of trees you might find it hard to distinguish between the dark shapes, remember anything that isnt as bright as your light source that you are telling the camera to take its light reading from is going to be dark.

Here are some other examples.

Now that we seems to be heading towards spring a little, the sun might be putting in an appearance more often so get out there and give it a go.

Do let me know how you get on!!


Follow:

the back to frontedness of aperture…getting to know your F-stop #photography101 #mamarazzi

When i first started getting interested in photography one of the things that really really confused me was the way that photographers talked about aperture. Small number means wider, faster aperture.  Larger number means slower and narrower aperture. It just seemed back to front to me. I could never really make sense of it and basically the only way i did make sense was to accept it and learn it. Like a language.

So briefly.

In photography, the aperture refers to the opening in the lens where light is admitted. The aperture value is also commonly referred to as the f/stop. This is why you will see “f/5.6”. “F” simply refers to the focal length of the lens. Think of the lens as you would the human eye.

The larger the aperture, the more light will pass through, allowing the nice background blur in your images, or bokeh. This will allow the main subject to “pop” as it stands out against the background.

The blurred background is aesthetically appealing when doing portrait photography or close-up nature photography (i.e., flowers).

Remember, when using the Aperture Priority on your camera, the lower the Aperture value (i.e., f/1.8, f/4.5; f/5.6), the larger the opening at the fron of your lens. Much like an eye. Well..a lot like an eye!

When shooting a landscape where you want everything to be in focus, you would want to use a smaller aperture, or higher f-stop. Or when you are shooting somewhere with a LOT of light. Like when you are trying to take pictures of the sun (sunrise, sunset). There is a well known rule in photography called the “sunny 16”. When you are taking a shot and want to include the sun in it, without blowing it out, then your aperture should be around about f16.0 or slower.

Now if you suddenly think ‘great i can take a great shot of my kids playing in the sun on the beach’ and you crank in you f stop to 16 you will end up with lovely shot of the sun and dark kids…Remember the amount of light coming into the camera is governed by the size of the hole and the hole at f16.0 is small so unless your kids are as bright as the sun…

and yes i know that some parents think their kids are 😉

anyway unless they are then they will be dark. BUT that is another issue i can talk about some other time.

Lost yet?
OKay well here is some examples i shot of the same image on different apertures…
so this first one is on a FAST aperture of 2.8
the amount of things in focus in this image is small right? the doll at the front is and then it blurs off pretty quickly. A fast aperture means a shallow depth of field.
then the same image at f6.3
 so depth of field increasing and so more in focus and yes the toys have all changed positions! thats what happens when you try and work out shots with small people about!!
then at f22.0 which is super slow and only really going to work if your light is reasonable. (again something we can talk about another time) But check it out even this time even Daddy Pig is in focus!! 😉
So has that helped at all?
If you shoot on AV or aperture setting on your camera and play. You can obviously do all this in your manual settings.
Which some folk think that if you aren’t using manual then you aren’t a proper photographer. Well my opinion is that cameras these days are clever little things and why fumble around trying to work of your shutter and ISO if your camera can take the strain for you. Yes in manual you are a LOT more in control but you have to know what to control and how.
In the priority settings on your camera you can focus on and understand one part of the process, one bit at a time. 🙂
Try to think light first though if you are in a really dimly lit room then you are unlikely to be able to achieve and aperture of f22.0 but then why would you want to anyway?  Probably the nicest look for inside is the buttery bokeh of a fast aperture.
Happy shooting and pop back and let me know how you get on!!
Follow:

whats that about white balance? #mamarazzi #photography101

I went for a super 4oth birthday lunch a few weeks ago and I had a conversation with a friend about cameras, her camera in particular and she was saying how she was really frustrated with her pictures that she was taking when she was indoors. We talked around what settings she was using and what lens, then i said

‘have you tried changing your white balance?’ – and then a little lightbulb may have just gone on.

Its a very very simple thing and yet it can be so effective in changing the look of your image.

What is white balance?

It all boils down to the concept of colour temperature. Color temperature is a way of measuring the quality of a light source.

The unit for measuring this ratio is in degree Kelvin (K). A light with higher color temperature (i.e., larger Kelvin value) has “more” blue lights than a light with lower color temperature (i.e., smaller Kelvin value). Thus, a cooler (resp., warmer) light has a higher (resp., lower) color temperature. But we don’t need to get too in depth do we!!

This is a few screenshots of how you can change your white balance…

nikon display

Canon display

The symbols you can see are fairly self explanatory, shade, the little lightbulb for inside, sunshine etc etc. Its fairly easy to follow. You dont always need to swop the white balance though. Sometimes the auto white balance does a great job and others you might just want to have a play and see if it makes a difference to your shot. Here is an example of the same shot, in different white balance modes.

these two subtle difference between daylight and auto. The daylight setting adds more creamy, golden colours…

the other thing to remember is what WB works in what environment.

For example if you are in a really creamy, orangey environment like a pub or a restaurant with lots of artifical lighting then tungsten might be a good white balance to use.

But if you are outside, be careful as it will turn everything blue!! you can see here i have changed the WB to tungsten (thats the little bulb) on the top picture, it looks cold and not at all right.

But inside it can get rid of some of those really orange and yellow tones that can come from house lighting and also from large bits of dark wood that reflect the light coming into a room onto anything that you are shooting. Especially if you are struggling with getting the pictures to look half decent indoors sometimes adjusting the white balance might just help. T

These shots of the cakes, i changed the WB (you can do it in a post processing software like photoshop if you shoot in RAW) and i it has taken some of the creamy gold out of the shots,which is more true to the actual cake.

Of course you can always set your own white balance and that would be a custom white balance.

You can do this by telling your camera what white is. This is easy and don’t be put off by fancy white balance gizmos. All you need is a bit of white paper. Hold it in front of your camera and correctly expose for the shot, keeping your white bit of paper in the centre. Like this.. The little grid at the bottom of the screen with the +1/+2 on it your little marker needs to be in the middle.

then go to the custom white balance but of your menu and press set and it will probably ask you if you want it to use the data from this image for white balance, say YES!

It can make a real difference! look at these two!

Very important thing to remember is that if you are using custom white balance you have to re-set every time your lighting changes, make sense?

Go on, go and have a play with white balance and make sure you have stab at custom white balance and let me know how you get on!

Follow: